Are you looking for a simple and effective way to repair torn drywall in your home? Look no further! Our step-by-step guide will show you exactly how to fix any tears or holes in your drywall.
Key Takeaways:
- Repairing torn drywall is a relatively easy process that can be done using a step-by-step guide.
- Start by removing any loose paper and sealing the exposed gypsum to create a smooth base for the repair.
- Apply joint compound to the torn area, sand it down, and repeat the process until the area is smooth.
- Paint over the repaired area, ensuring it seamlessly blends with the surrounding wall.
- For small holes caused by screws or hooks, drive the nails back down and fill with spackle, then sand and paint.
Removing Loose Paper and Sealing the Exposed Gypsum
Before you begin the repair process, it’s important to remove any loose paper and seal the exposed gypsum in order to create a stable surface for the patch. This will ensure that your repair lasts and blends seamlessly with the surrounding wall. Here’s a step-by-step guide on how to accomplish this:
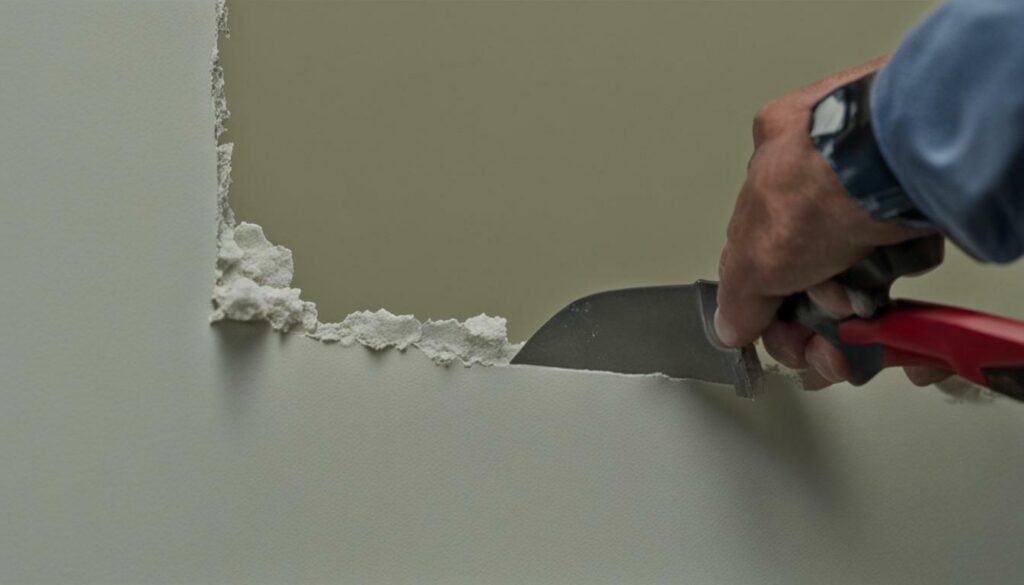
- Start by using a utility knife to carefully cut away any loose or frayed paper around the torn area. Be gentle to avoid causing further damage.
- Once you have removed the loose paper, inspect the torn area for any jagged or uneven edges. Use sandpaper to smooth them out, ensuring a clean and even surface for the patch.
- Next, apply a drywall primer and sealer or an old oil-based paint to seal the exposed gypsum. This step is crucial as it prevents blisters and ensures a strong bond between the patch and the existing wall.
- Allow the primer or sealer to dry completely before moving on to the next steps of the repair process. This will vary depending on the product used, so be sure to follow the manufacturer’s instructions.
By following these steps, you can effectively prepare the torn drywall for repair and create a stable foundation for the patch. Taking the time to remove loose paper and seal the exposed gypsum will ultimately result in a professional-looking and long-lasting repair.
Key Tips:
When using a utility knife to remove loose paper, be careful not to cut too deeply into the existing wall. The goal is to remove any damaged or frayed paper, while keeping the surrounding area intact.
Applying Joint Compound and Sanding
Once the exposed gypsum is sealed, it’s time to apply joint compound to the torn area and sand it down for a smooth finish. Joint compound, also known as drywall mud, is a versatile material that is used to fill gaps, cracks, and holes in drywall. It is important to choose the right type of joint compound for your repair job. There are two main types: premixed and setting-type compound. Premixed compound is ready to use straight from the container, while setting-type compound hardens through a chemical reaction and requires mixing with water.
To apply the joint compound, start by using a putty knife or a trowel to scoop out a small amount of the compound onto a clean surface. Then, using the knife or trowel, spread the compound evenly over the torn area, making sure to extend it slightly beyond the edges of the tear. This will ensure a seamless repair.
After applying the joint compound, allow it to dry completely. The drying time will vary depending on the type of compound used, so it’s important to follow the manufacturer’s instructions. Once the compound is dry, it’s time to sand it down. Use fine sandpaper or a wet sanding technique to smooth out any imperfections and create a seamless finish. Sand in a circular motion, applying gentle pressure. Be careful not to sand too aggressively, as this can damage the surrounding drywall.
Remember, repairing torn drywall takes some patience and practice. Don’t be discouraged if your first attempt isn’t perfect. With time and practice, you’ll be able to achieve professional-looking results.
Tips for a successful DIY torn drywall repair:
- Apply thin layers of joint compound, allowing each layer to dry before applying the next. This will help you build up a smooth and even surface.
- Use a sanding block or a sanding sponge to ensure an even sanding and to prevent uneven patches.
- Wipe away any dust or debris from sanding before applying another layer of joint compound or painting.
- Consider using a primer before painting to ensure better adhesion and a more even finish.
- If the torn area is particularly large or deep, you may need to apply multiple layers of joint compound, allowing each layer to dry in between.
By following these steps and tips, you can easily repair torn drywall and achieve professional-looking results. Take your time, be patient, and don’t be afraid to experiment and learn from your mistakes. With practice, you’ll become more confident in your DIY skills and be able to tackle more complex drywall repairs.
| Materials: | Tools: |
|---|---|
| Joint compound | Putty knife or trowel |
| Sanding block or sanding sponge | Utility knife |
| Fine sandpaper | Drywall primer and sealer |
| Drywall primer and sealer (optional) | Clean cloth or sponge |
| Paint (optional) |
After the joint compound has dried and the repaired area is smooth, it’s time to paint over the patch to make it virtually invisible. Choosing the right paint color and finish is essential to achieve a seamless blend with the surrounding wall. Here are the steps to follow for a flawless finish:
- Clean the area: Use a damp cloth to remove any dust or debris from the repaired section. This will ensure a smooth surface for painting.
- Priming: Apply a coat of primer to the repaired area. This will help the paint adhere properly and prevent any discoloration or unevenness.
- Paint selection: Choose a high-quality paint that matches the color and finish of the existing wall. It is recommended to bring a small sample of the existing wall color to the paint store for an accurate match.
- Paint application: Use a paintbrush or roller to apply the paint to the repaired area. Start from the edges and work your way towards the center, blending the paint with the surrounding wall. Apply multiple thin coats rather than one thick coat for better results.
- Drying and touch-up: Allow the paint to dry completely between coats as per the manufacturer’s instructions. Once the final coat is dry, inspect the area for any imperfections and touch up if necessary.
By following these steps, you can achieve a professional-looking finish and make the repaired area virtually invisible. It’s important to take your time and pay attention to detail to ensure a successful outcome. Remember, practice makes perfect, so don’t be discouraged if it doesn’t turn out perfect the first time. With a little patience and practice, you’ll be able to repair torn drywall like a pro.
Repairing Small and Large Holes in Drywall
Whether you have a small hole from a screw or a larger hole in your drywall, we’ve got you covered with step-by-step instructions on how to fix them. Repairing torn drywall is a relatively easy process that can be done using a few simple tools and materials. Follow these guidelines to achieve a professional-looking repair job.
For small holes caused by screws or hooks, start by driving the nails back down until they are flush with the wall. Then, fill the hole with spackle using a putty knife. Make sure the spackle is evenly spread and slightly raised above the surface of the wall. Allow it to dry completely before sanding it smooth with fine sandpaper.
For larger holes, you will need to cut out the damaged area using a drywall saw or utility knife. Cut along the edges of the hole in a square or rectangular shape. Next, install supports by attaching a piece of wood behind the hole using screws. This will provide a stable base for the patch.
Cut a new piece of drywall to fit the hole and insert it into the opening. Secure the patch to the supports using drywall screws. Cover the seams between the patch and the existing wall with joint compound and smooth it out with a putty knife. Apply a layer of joint compound over the entire patch, extending it slightly beyond the edges. Once the compound has dried, sand it smooth and then paint over the repaired area to match the surrounding wall.
In conclusion, repairing small and large holes in drywall is a straightforward process that can be done with a little patience and the right techniques. Follow these step-by-step instructions to achieve a seamless repair job and restore the appearance of your walls.
| Tools and Materials | Instructions |
|---|---|
| Utility knife | Use a utility knife to remove any loose paper around the hole. |
| Spackle | Fill small holes with spackle, making sure to spread it evenly and slightly raised above the surface. |
| Drywall saw or utility knife | Cut out the damaged area in a square or rectangular shape. |
| Piece of wood and screws | Install supports behind the hole to provide a stable base for the patch. |
| Drywall patch | Cut a new piece of drywall to fit the hole and secure it to the supports. |
| Joint compound | Cover the seams between the patch and the existing wall with joint compound. |
| Putty knife and sandpaper | Smooth out the joint compound and sand it down until it is flush with the wall. |
| Paint | Paint over the repaired area to match the surrounding wall. |
Conclusion
Repairing torn drywall is an achievable DIY project that can save you time and money. By following our step-by-step guide, you’ll be able to repair any tears or holes in your drywall and give your walls a fresh, new look.
To start, remove any loose paper using a utility knife and seal the exposed gypsum to prevent blisters. Apply joint compound to cover the torn area, extending it past the edges, and sand it down for a smooth finish. Once the compound is dry, sand it again and then paint over the repaired area.
If you have small holes caused by screws or hooks, drive the nails back down, fill with spackle, and then sand and paint. For larger holes, cut out the damaged area, install supports, apply a drywall patch, tape and seal the patch, and finish with sanding and painting.
By following these simple steps, you can repair torn drywall easily and achieve professional-looking results. So don’t let those tears or holes ruin the appearance of your walls. Take matters into your own hands and restore your drywall to its former glory!
FAQ
Is repairing torn drywall difficult?
Repairing torn drywall is a relatively easy process that can be done using a step-by-step guide.
How do I remove loose paper from torn drywall?
Use a utility knife to remove any loose paper from the torn drywall.
What should I do to seal the exposed gypsum?
To seal the exposed gypsum, use drywall primer and sealer or old oil-based paint.
What is the next step after sealing the exposed gypsum?
Cover the torn area with joint compound, spreading it evenly and extending it past the edges of the tear.
How do I sand the repaired area?
Use fine sandpaper or a wet sanding technique to sand the area before applying another layer of joint compound.
How do I paint over the repaired area?
Once the joint compound has dried, sand it smooth and then paint over the repaired area.
How do I repair small holes in drywall caused by screws or hooks?
Drive the nails back down, fill the holes with spackle, sand, and then paint over the repaired area.
What should I do for larger holes in drywall?
Cut out the damaged area, install supports, cut and install a drywall patch, tape and seal the patch, and then sand and paint.
Why is it important to follow a step-by-step guide?
Following a step-by-step guide will help you easily repair torn drywall and achieve a professional-looking result.


