The Common Causes of Water Damage on Drywall
Water damage is a common problem that homeowners face, and it can be caused by a variety of factors. Leaky roofs, burst pipes, overflowing sinks or tubs, and even natural disasters like floods or heavy rain can all lead to water damage on drywall. Whatever the reason may be, water can penetrate drywall quickly and cause extensive damage if not addressed promptly.
Learn how to repair minor water damaged drywall with this detailed guide. Don’t let small leaks turn into big problems – act fast and fix it now!
Signs of Water Damage in Drywall
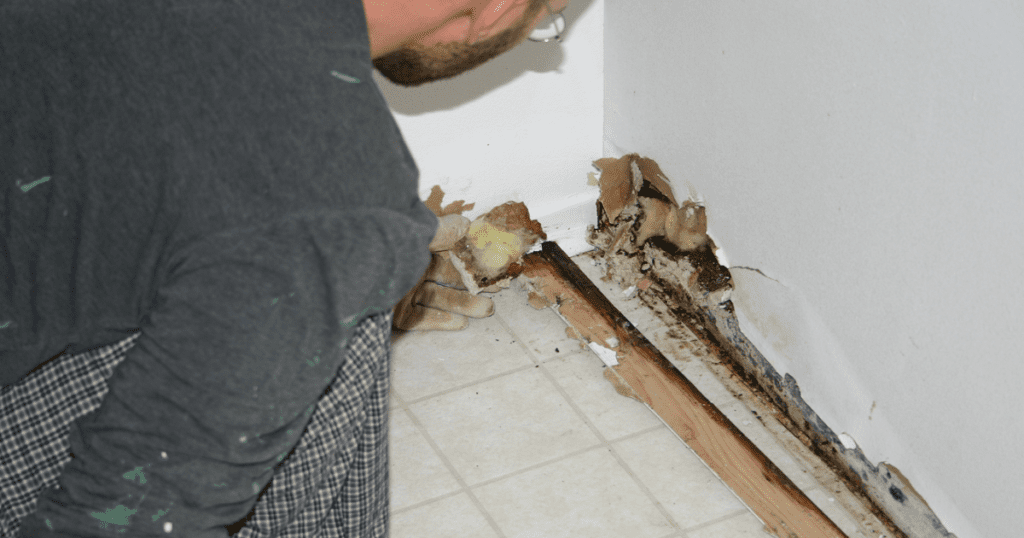
There are several warning signs that homeowners should look out for to identify water damage on their drywall. Water stains or discoloration on walls or ceilings are the most obvious indicators. Additionally, warped or sagging walls, peeling paint or wallpaper, and a musty odor in affected areas may also indicate water damage.
Dealing with Moisture in Walls
Moisture is the primary culprit behind most cases of water damaged drywall. If left unaddressed, moisture can lead to mold growth and structural issues like rotting wood and weakened supports. To prevent this from happening, it’s essential to remove any excess moisture from walls as soon as possible.
Importance of Repairing Minor Water Damage As Soon As Possible
Ignoring minor water damage may seem like an easy solution at first – after all, it’s just a small stain on your wall – but it could lead to bigger problems down the line. When left unaddressed for an extended period of time, mold growth may spread throughout your home, which will be more costly than resolving minor repairs early.
Can I Fix Water Damaged Drywall Myself?
DIY drywall repair is possible if you have some basic experience with tools and home improvement. However, it’s important to note that repairing water damaged drywall can be a tricky process. If you’re not confident in your abilities or don’t have the proper tools for the job, it may be best to leave it to the professionals.
Preventing Drywall Water Damage
The best way to deal with water damaged drywall is to prevent it from happening in the first place. Simple measures like fixing leaky faucets or pipes, regularly checking roofs for damage, and installing dehumidifiers in humid areas of your home can go a long way in preventing water damage. Additionally, staying aware of possible sources of water damage in your home will help you catch any issues early on before they cause more considerable harm.
Costs of Repairing Water-Damaged Drywall
The costs associated with repairing water-damaged drywall will vary depending on the extent of the damage, local labor costs, and materials needed for repair. In general, drywall repair techniques are relatively affordable compared to other home improvement projects. Fixing a minor leak and conducting easy steps to fix a wet wall would cost significantly less than having walls replaced altogether. Make sure to follow these steps when dealing with minor water restoration projects so that you can save both time and money!
Assessing the Damage
Inspect the Affected Area and Determine the Extent of the Damage
When it comes to water damage on drywall, a quick and thorough assessment of the affected area is crucial. Without an accurate understanding of the extent of damage, a repair job can easily become much more complicated and costly than necessary. The first step in assessing water damage is to look for visible signs, such as discoloration or warping.
But don’t stop there – make sure to also check for any soft spots or weak areas that may not be immediately visible. If you’re unsure about any part of your assessment, consider calling in a professional.
Look for Signs of Mold Growth or Structural Damage
Mold prevention after water damage should be at the forefront of your mind when it comes to repairing water-damaged drywall. The longer moisture sits in an area, the greater the likelihood that mold will grow. Make sure to thoroughly inspect all areas surrounding your water-damaged drywall for signs of mold growth.
Additionally, look out for structural damage caused by water absorption. If you find that portions of your wall have become saturated with moisture and are no longer structurally sound, it may be time to call in a professional instead of attempting DIY drywall repair techniques.
Ultimately, properly assessing water-damaged drywall is key to ensuring that repairs are done effectively and efficiently. Don’t underestimate this crucial step in restoring your home’s interior.
Preparing for Repair
Gather Necessary Tools and Materials
Before you start repairing your water damaged drywall, you need to gather the necessary tools and materials. Trust me; this will save you a lot of time and frustration later on. First things first, make sure to have a drywall saw, as it’s the most important tool for this job.
Next on your list should be joint compounds, sandpaper, paint, and screws or nails for fixing new drywall pieces. Don’t skimp out on these materials; get high-quality ones that can withstand future water damage.
Turn off Power to Electrical Outlets
If there are any electrical outlets in the affected area, turn off their power before starting repairs. Water can cause short circuits leading to electrocution or even fires.
If you’re not comfortable working with electricity, it’s best to call in a licensed electrician before continuing with the repairs.
Preventing Drywall Water Damage Tips
In addition to knowing how to repair minor water damaged drywall, it’s essential that homeowners take measures to prevent such damage from occurring in the first place. One way of preventing drywall water damage is by fixing any leaks as soon as they’re noticed.
Another preventive measure would be sealing your walls with waterproof paint or coating material that can resist moisture build-up and prevent mold growth.
Costs of Repairing Water-Damaged Drywall
The costs of repairing water-damaged drywall vary widely depending on several factors, such as the extent of damage and whether or not you decide to hire professionals for the job. If it’s just minor damage, then you can save money by doing it yourself.
Otherwise, hiring experts might be more beneficial in terms of time-saving and ensuring work is done correctly.
As mentioned earlier, knowing how to repair minor water damaged drywall is crucial if you want your walls to remain in good condition. By following the steps outlined above, you can save yourself a lot of time and money while ensuring that your drywall remains strong and looking good.
Remember to gather all materials before starting repairs and turn off power to any electrical outlets in the affected area. Take preventive measures such as fixing leaks and sealing walls with waterproof paint or coating material to avoid future water damage.
Removing Damaged Drywall
Use the Right Tools for the Job
One of the most important steps to repair water-damaged drywall is to use the right tools. One of those tools is a drywall saw, which you will need to cut out any damaged sections of drywall in a square or rectangular shape. If you try to use any other type of saw, such as a jigsaw or circular saw, you risk damaging other parts of your wall or even injuring yourself.
Be Careful Not to Cut into Wires or Pipes
When using a drywall saw, it’s crucial that you’re careful not to cut into any wires or pipes behind the wall. Before making any cuts, make sure you know where these critical elements are located. If you’re unsure about their position, use a stud finder or consult with an expert.
Drywall Repair Techniques: Replace vs. Repair
In some cases, repairing water-damaged drywall may be enough to fix the problem. However, if the damage is extensive enough that it covers more than 25% of the surface area of your wall or ceiling, replacing it entirely might be your best option.
When deciding between replacing and repairing your damaged drywall, consider factors like the cost and time required for each option. Removing damaged drywall requires using proper tools like a drywall saw and being cautious not to cut into wires or pipes behind the walls.
Additionally, it’s essential to evaluate whether a repair will suffice versus full replacement based on various factors like damage extent and cost. Following these steps and tips for drying out walls after water damage restoration can help prevent mold growth while keeping your home safe and secure for years to come with minimal DIY home repairs needed!
Drying Out Moisture
Use Fans or Dehumidifiers to Help Dry Out Any Remaining Moisture in the Affected Area
After removing any damaged drywall, it is important to dry out the affected area completely before beginning any repairs. This will not only prevent future mold growth but also ensure a proper application of the joint compound. The easiest way to do this is with fans or dehumidifiers.
Fans are effective at circulating air and speeding up the drying process.
- Place them strategically around the room, pointing towards the affected area.
- Make sure to leave them running until all moisture has evaporated from the walls and ceiling.
Dehumidifiers are also useful for removing excess moisture from the air.
- They work by drawing humid air over cold coils, causing condensation to form and collect in a reservoir tank.
- Once again, place these machines near the affected area and run them until all moisture has been removed.
Check for Signs of Mold Growth and Address It Accordingly
Mold can grow quickly on damp drywall surfaces, especially in warm environments with poor ventilation. Signs of mold growth include discoloration, musty odors, and visible spores on surfaces.
If you notice any signs of mold growth while repairing water-damaged drywall, address it immediately. To remove mold growth on surfaces, use a solution of bleach diluted with water (one part bleach to three parts water).
Wear protective gloves and clothing while cleaning, as bleach can be harsh on the skin. Scrub thoroughly with a stiff brush and rinse with clean water.
To prevent mold from returning after cleaning, make sure that there is proper ventilation in the room. Open windows or use exhaust fans to circulate air properly through the space.
Installing New Drywall
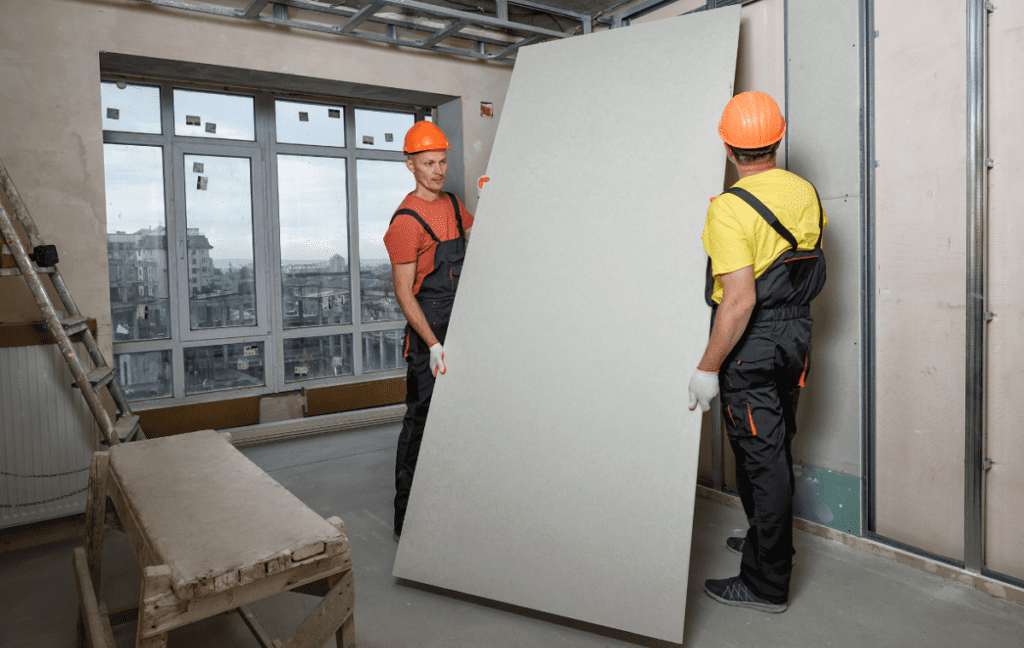
Cut a New Piece of Drywall that Fits into the Hole You Created Earlier
When it comes to installing new drywall, one of the most important things to keep in mind is accuracy. Cutting your drywall too large or too small can make installation a nightmare.
Make sure you measure precisely before cutting, and if possible, use a drywall square to ensure perfect cuts. It’s also important to remember that not all drywall is created equal.
If possible, purchase the same thickness and type of drywall that was used for the original wall. This will result in a more seamless repair job and save you from having to deal with potential structural issues down the line.
Secure it in Place with Screws or Nails
Once your new piece of drywall has been cut and properly sized, it’s time to secure it in place. While some DIY guides may recommend using nails for this process, we strongly advise against this option. Nails are more likely to pop out over time due to wall movement and temperature changes.
Instead, use screws for a sturdier hold. Make sure they are long enough to go through both pieces of drywall and into the stud behind them for added stability.
Apply Joint Compound Over Seams and Sand Down Until Smooth
After securing your new piece of drywall in place, it’s time to apply joint compound over the seams between your old and new pieces. Be generous with your application, as this will help create a smoother finish once sanded down.
When sanding down joint compound, be sure not to rush the process. Take your time so that you don’t accidentally remove too much compound or leave uneven spots on your wall.
Remember – patience is key when it comes to home repairs! Replacing damaged portions of your home’s drywall can be a daunting task, but with the right tools and techniques, it’s definitely doable.
Make sure to measure precisely, use screws for added durability, and take your time when sanding down the joint compound. By following these tips and tricks, you’ll have your walls looking good as new in no time!
Finishing Touches
Wall Repair and Painting: The Final Touches to Your DIY Drywall Repair
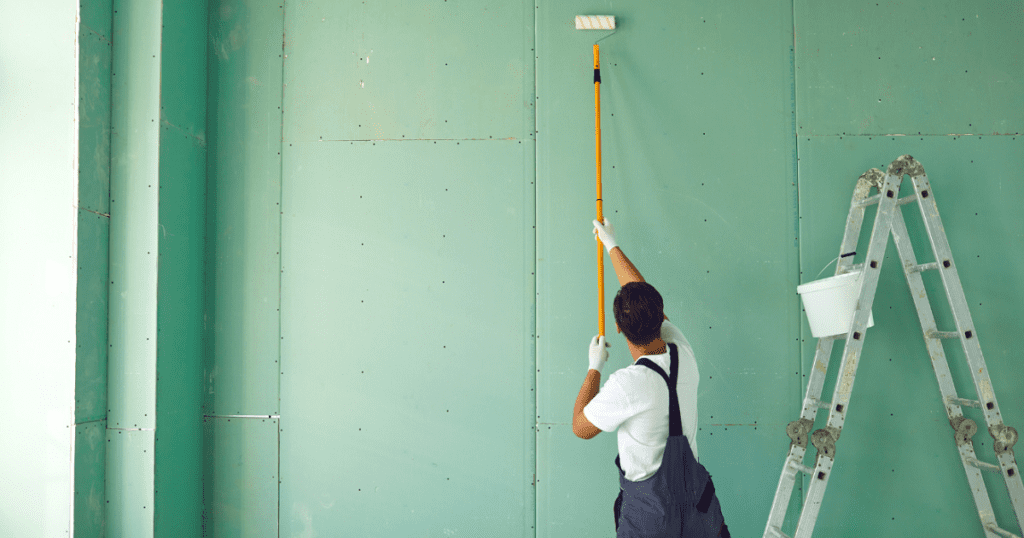
Congratulations! After successfully completing all the tough steps and hard work, it’s time to finish up that drywall repair job with some paint. Painting your repaired drywall will not only make it look new but will also protect it from future damage.
After all, what’s the point of going through all that effort if you can’t even enjoy the finished product?
- The first step in painting your repaired drywall is applying a coat of primer. The primer will help cover any stains or imperfections and ensure proper adhesion for the paint. When selecting a primer, choose one that is specifically designed for water-damaged walls. Be sure to let it dry thoroughly before proceeding.
- Next, choose a high-quality paint that matches the color of your existing wall. Apply two coats of paint using a roller or brush, allowing each coat to dry completely before applying the next one. If necessary, you can use a small brush or sponge to touch up any missed spots or areas where the joint compound may have been visible.
Joint Compound Application Techniques: An Art and Science in Itself
When repairing water-damaged drywall, a joint compound is key to achieving a smooth surface for painting over. However, applying joint compound is an art form in itself and requires some skill and patience to get right.
- Start by mixing your joint compound until it reaches a consistency similar to toothpaste – not too thick or too thin.
- Using a putty knife or trowel, apply the compound in thin layers over the seams between pieces of the new and existing drywall.
- For larger repairs where you’ve had to cut out larger sections of damaged drywall, be sure to apply multiple layers in order to create an even surface with no bumps or ridges.
- Allow sufficient drying time between layers – usually about 24 hours.
- Once the compound is fully dry, use a sanding block to smooth out any rough patches or uneven spots.
- Be sure to remove all dust and debris before painting.
Preventing Drywall Water Damage: Tips for Keeping Your Walls Looking Great
While repairing water-damaged drywall is certainly an achievable DIY project, preventing water damage in the first place is always the best course of action. Here are some tips for keeping your walls looking great and avoiding costly repairs:
- Address any signs of water damage in your walls as soon as possible to avoid mold growth or structural damage.
- Use dehumidifiers or fans to help dry out any moisture in the affected area.
- Regularly inspect areas that are prone to water damage (kitchens, bathrooms, etc.) and address any issues immediately.
- Have the leaky pipes or faucets repaired promptly.
- Consider using waterproof paint or coatings on walls that are exposed to moisture on a regular basis. Remember, prevention is always better than cure when it comes to water-damaged drywall!
Frequently Asked Questions
How do you fix minor water damaged walls?
Minor water damaged walls can often be fixed by first drying out the area thoroughly using fans or dehumidifiers, then sanding any flaking paint, applying a stain-blocking primer, and repainting the area. It’s crucial to check for any signs of mold before repairing, as it may require professional remediation.
Can drywall dry out after water damage?
Drywall can dry out after water damage, especially if the damage is minimal and the drying process begins promptly. However, if the drywall is severely waterlogged, sagging, or moldy, it might need to be replaced.
Can I paint over water damaged drywall?
While it’s technically possible to paint over water-damaged drywall, it’s not advisable unless the drywall has been thoroughly dried and any damage or mold issues have been addressed. If not properly treated, the damage can worsen over time, and the paint may peel or bubble.
What is the best way to remove water damaged drywall?
The best way to remove water damaged drywall is to first turn off power to the area, then use a utility knife to cut out the damaged section, being sure to avoid any electrical wires. Once the damaged drywall is removed, dispose of it properly and let the area dry out completely before replacing it.
What do you spray on walls after water damage?
After water damage, it’s important to spray the walls with a mold-inhibiting product to prevent the growth of mold and mildew. Products such as Concrobium Mold Control or a bleach-water solution can be used, but always follow the manufacturer’s instructions and ensure the area is well-ventilated.
Conclusion
Don’t Wait, Act Fast
Repairing minor water damage on drywall may seem like a small task, but it can quickly escalate into a much larger and more costly problem if left unaddressed. The costs of repairing water-damaged drywall can be astronomical compared to the relatively low costs of fixing the problem when it first arises.
The truth is that even seemingly insignificant water damage symptoms in walls can lead to bigger issues, such as mold growth or structural damage, if they are not addressed promptly. Therefore, it is important to act fast when you notice any signs of water damage on your walls.
Gather your tools for drywall repair and be prepared to take action without delay. Invest in dehumidifiers for drywall drying and other home improvement tips that can help speed up the process and prevent further damage from occurring.
Take Control of Your Home Maintenance
Restoring water-damaged interiors may seem daunting, but with the right tools and techniques at your disposal, it doesn’t have to be a headache-inducing nightmare. DIY home repair is becoming increasingly popular among homeowners who want to take control of their home maintenance without breaking the bank on professional services. By learning easy steps to fix a wet wall or applying joint compound application techniques yourself, you can save hundreds, if not thousands, of dollars in expensive repairs down the line.
Drywall replacement vs. repair is an age-old debate among homeowners – while some people prefer DIY drywall repair techniques because they are more cost-effective, others prefer hiring professionals for their expertise. Regardless of which option you choose, taking care of your drywall maintenance now will save you time and money later on.
Mold Prevention is Key
One crucial aspect of repairing minor water damaged drywall that cannot be emphasized enough is mold prevention after water damage has occurred. Mold can grow quickly in moist environments and can cause serious health issues if left unchecked. Signs of water damage in drywall, such as discoloration or warping, should be addressed immediately to avoid mold growth.
Tips for drying out walls include using dehumidifiers for drywall drying and allowing good air circulation around the affected area. Additionally, wall repair and painting can help prevent mold growth by providing a barrier against moisture.
In short, fixing minor water damage on your drywall may seem daunting at first, but with the right tools and techniques at your disposal, it can be done quickly and efficiently. Take control of your home maintenance today to prevent bigger problems down the line!


