Get ready to dance with your lawn as we unravel the secrets of adjusting an oscillating sprinkler! This playful guide will have you twirling knobs and mastering the art of water choreography in no time. From fine-tuning the spray pattern to finding that perfect distance, we’ll sprinkle you with all the knowledge you need to make your lawn the envy of the neighborhood. So, put on your dancing shoes, and let’s make those water arcs pirouettes!
To adjust an oscillating sprinkler, locate the adjustment knobs on the sprinkler head and base. Turn the range adjustment knob to set the desired coverage area and distance. Use the pattern adjustment knob to control the width and shape of the spray pattern.
The Importance of Adjusting Your Oscillating Sprinkler
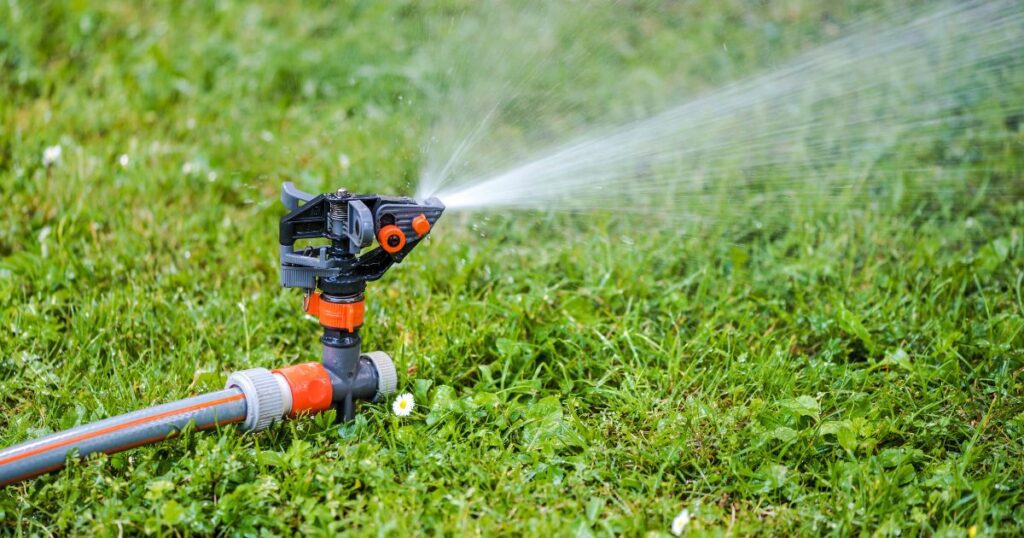
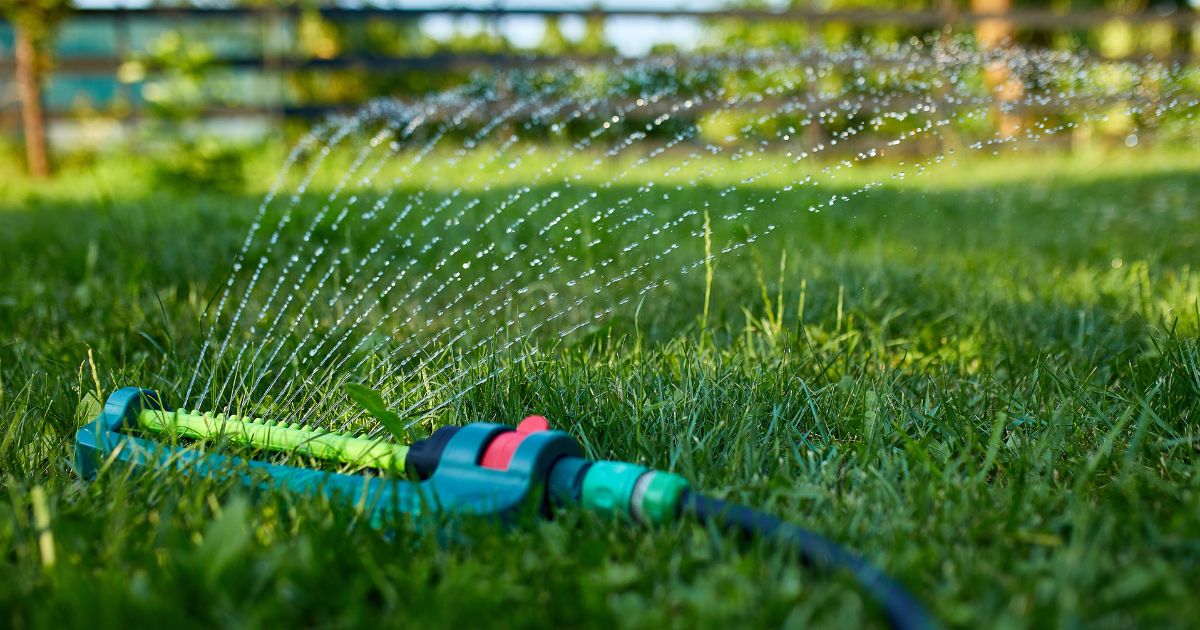
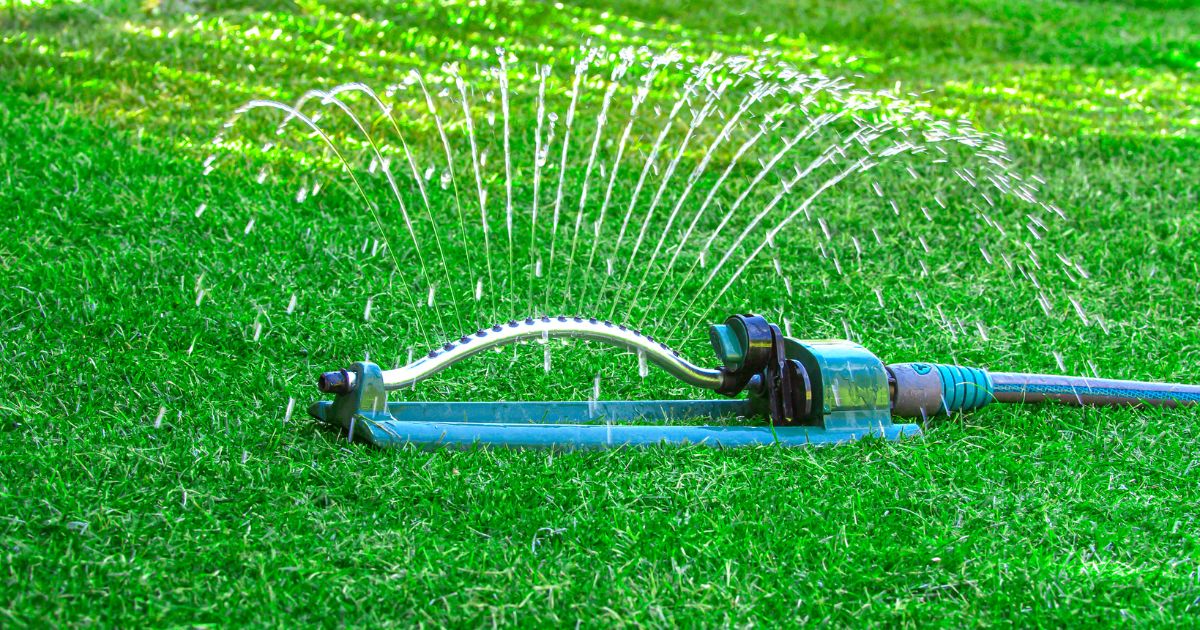
Oscillating sprinklers are a common tool used for watering lawns, gardens, and other outdoor areas. They consist of a long metal or plastic tube with holes that spray water in a back-and-forth motion.
The purpose of this article is to provide instructions on how to adjust your oscillating sprinkler for optimal performance. Adjusting your sprinkler is important because it ensures that your lawn or garden is being watered evenly.
When your sprinkler is not properly adjusted, it can result in dry spots and overwatered areas. This can lead to an unhealthy lawn or garden and wasted water.
By adjusting the range, width, and water flow rate of your oscillating sprinkler, you can customize its settings to fit the specific needs of your lawn or garden. These adjustments will help you save both time and money by conserving water while still providing adequate hydration for your plants.
In addition, properly adjusting your oscillating sprinkler can also help prevent runoff and overspray onto sidewalks or driveways. This not only saves water but also prevents unnecessary damage to hardscape surfaces.
Overall, taking the time to adjust your oscillating sprinkler will save you money, conserve water resources and promote a healthy lawn or garden. In the following sections, we will provide step-by-step instructions on how to adjust each element of an oscillating sprinkler for optimal performance.
Understanding Your Sprinkler
The Different Parts of an Oscillating Sprinkler and Their Functions
Oscillating sprinklers have several parts that work together to distribute water evenly across your lawn. Understanding the different parts and their functions is crucial to adjusting your sprinkler for optimal performance.
Here are the main parts of an oscillating sprinkler:
1. Base – The base is the part that sits on the ground and supports the other components. It usually has an adjustable height feature to raise or lower the sprinkler head.
2. Sprinkler head – The sprinkler head is where the water comes out, and it moves back and forth, distributing water in a rectangular pattern across your lawn.
3. Nozzles – Nozzles are small openings on the top of the sprinkler head where the water exits to irrigate your lawn.
4. Control knobs – Control knobs adjust different aspects of your oscillating sprinkler’s performance, such as range, width, and flow rate.
The Importance of Understanding Your Sprinkler Before Making Any Adjustments
Before diving into the realm of adjusting your oscillating sprinkler, it’s crucial to grasp its inner workings, its potential, and its boundaries. This knowledge empowers you to make informed choices when fine-tuning its settings, ensuring it delivers peak performance. By understanding how to adjust oscillating sprinkler effectively, you’ll unlock its full potential and achieve an optimal watering experience for your cherished plants and green spaces.
Some important factors you should consider include:
1. Water pressure: Different oscillating sprayers require varying amounts of water pressure for optimal performance. Check with your manufacturer or retailer for guidance on what level of pressure is best suited for your specific model.
2. Lawn size & shape: The size and shape of your lawn will determine how many oscillations you need from your sprayer in order to ensure complete coverage without over or under-watering certain areas.
3. Soil type & plant material: Certain soil types drain more quickly than others; certain plant materials require more or less water than others. Understanding these factors will help you calibrate your sprinkler appropriately.
4. Weather conditions: Different weather conditions can affect how well your sprinkler works. For example, heavy winds can cause uneven water distribution, while hot and dry temperatures might require more frequent watering.
Understanding the parts of your oscillating sprinkler and its capabilities is the first step in adjusting it for optimal performance. Taking time to learn about these aspects can save you time and money in the long run by preventing over or under-watering and other common issues that can arise from improper use.
Adjusting the Range
One of the essential aspects to adjust on your oscillating sprinkler is its range. The range control knob can be found on the top or side of your oscillating sprinkler, depending on its brand and model.
To adjust the range, you need to turn the knob clockwise or counterclockwise until it reaches your desired spray distance. However, before making any adjustments, it’s essential to understand your lawn size and shape.
For instance, if you have a narrow rectangular lawn, you don’t require a long-range as much as a wide-range spray pattern. If you have a large round-shaped lawn with bushes or trees in between, shorter ranges between 10-20 feet are ideal for optimal watering coverage.
Determining Your Ideal Range
The perfect range for an oscillating sprinkler depends on soil type and plant type. Clay soil will require shorter ranges than loamy soils because clay soils absorb water slowly. Faster absorption may cause runoff leading to overspray around plants and wasting water unnecessarily.
You can determine your ideal range by starting at a middle position around 25-30 feet away from your sprinkler head and then adjusting it up or down depending on how much watering coverage you need. You can also walk back from the sprayer while checking how far-reaching the spray goes until you get the desired coverage without over-spraying or under-spraying.
RELATED: How To Find Sprinkler Heads For A Healthy Lawn
Tips for Adjusting Your Sprinkler’s Range
- If in doubt about which way to turn your knob for increasing/decreasing its reach/distance? Check user manual instructions/or run tests by gradually adjusting settings followed by checking observed results
- When spraying near driveways or pavement areas with limited drainage capacity – shortening distance might be required to avoid water runoff
- Always adjust the range knob when the sprinkler is on to see the immediate effect of the changes you made
- Try to make adjustments even across both sides of your sprinkler head so that water sprays evenly and not lopsided or in one direction
- Don’t set your range too short, as this can cause overwatering and result in fungal diseases that can affect plant growth. On the other hand – setting it too far might cause under-watering of plants.
Adjusting your oscillating sprinkler’s range is a simple task that can save you time and money in the long run. With the correct adjustments, you’ll ensure that your lawn is getting just the right amount of water without wasting any.
Adjusting the Width
Oscillating sprinklers come with a width control knob that helps you adjust the coverage area of the sprinkler. By changing the width, you can ensure that water is distributed evenly across your lawn and landscaping. Adjusting the width of your oscillating sprinkler is a straightforward process that requires no special tools or skills.
Step 1: Locate Your Width Control Knob
The first step in adjusting the width of your oscillating sprinkler is to locate your width control knob. This knob is usually located on top of the sprinkler, and it can be turned to adjust the width of the water coverage. The width control knob may be labeled with numbers, which indicate the number of spray holes that are activated.
Step 2: Adjust Your Width Control Knob
Once you have located your width control knob, turn it to adjust the width of the water coverage. Turning it clockwise will decrease coverage, while turning it counterclockwise will increase coverage. It’s important to note that different models may operate differently, so refer to your user manual if needed.
Tips for Determining Ideal Width
When adjusting the width of an oscillating sprinkler, determining the ideal coverage area depends on several factors such as lawn size and shape as well as water pressure measurement from the hose bib outlet with a water pressure gauge or use a flow meter to measure proper flow rate at the hose connection point. Firstly, consider lawn size and shape in relation to where plants are located within their respective garden beds or landscape areas. A rectangular-shaped lawn may require more distance between watering sessions than a circular-shaped one does due because areas close up will receive additional watering from adjacent areas during each watering session which could lead to over-watering.
Secondly, take into account any slopes or inclines in your yard when deciding how wide your oscillating sprinkler should be. Slopes or inclines may require additional width in order to ensure even coverage.
Water pressure has a significant impact on the width of an oscillating sprinkler. Lower water pressure will result in narrower coverage, while higher water pressure will result in broader coverage.
Use caution when adjusting water pressure to avoid damaging the sprinkler system. With these tips, you can adjust your oscillating sprinkler’s width to achieve optimal watering coverage for your lawn and landscaping.
Adjusting the Water Flow Rate
One of the key factors in achieving optimal lawn health is watering it effectively, which requires the right amount of water at the right time. To adjust your oscillating sprinkler’s water flow rate, there are two main methods to consider: using a flow control valve or a pressure regulator valve.
Using a Flow Control Valve
A flow control valve allows you to adjust the amount of water that flows through your sprinkler. You can find this valve on the outside of your sprinkler where it connects to your hose. Typically, these valves have a knob that you can turn clockwise or counterclockwise to increase or decrease the water flow rate.
To determine the optimal water flow rate for your lawn, you need to consider several factors, such as soil type, plant type, and weather conditions. If you have sandy soil and live in an arid climate, then you will need more watering compared to someone with clay soil in a humid climate.
You can also use this method to increase or decrease watering frequency. For instance, if you are experiencing drought conditions and want to reduce watering frequency while still getting enough water on your plants’ roots for survival, then turning down the flow control valve will help achieve that goal.
Using a Pressure Regulator Valve
A pressure regulator valve helps maintain consistent pressure in your sprinkler system by reducing high-pressure fluctuations caused by changes in demand and supply. This can especially be beneficial when dealing with low-pressure situations such as those experienced during peak usage times, like early morning hours when everyone is using their sprinklers.
If you use well water (as opposed to city-supplied), then this method may not be necessary since well water already has low-pressure tendencies. However, if you use city-supplied water and notice that your sprinkler is not performing optimally, then using a pressure regulator valve may be the solution.
When adjusting your sprinkler’s water flow rate, it’s important to remember that too much water can be just as dangerous as too little. Overwatering can lead to root rot and other diseases, while under-watering can cause your lawn to become brittle and die.
Optimizing Water Flow Rate for Your Lawn
The optimal water flow rate for your lawn will depend on several factors, such as soil type, plant type, weather conditions, and even the size of your lawn. Here are some tips to help you determine the best water flow rate:
- Frequent Check-Up: Check on your lawn periodically during watering to ensure that there is enough moisture getting through. A good rule of thumb is one inch of water per week.
- Weather Conditions: Adjust watering frequency according to weather conditions such as rain or drought. If it has been raining heavily lately, you might want to reduce the watering frequency or skip it entirely until the next week or so.
- Cycles: Many sprinklers are designed with a cycle option where they run for a certain amount of time before shutting off automatically. This can help prevent over-watering by allowing the soil time to absorb the necessary amount of moisture before being inundated with more water.
- Poor Drainage Areas: if you have areas in your yard where drainage is poor (puddles form after rain), consider reducing the watering frequency in these areas so they won’t become over-saturated with moisture.
Adjusting an oscillating sprinkler’s water flow rate may seem like an easy task, but it requires careful consideration and attention to detail. By using a flow control valve or pressure regulator valve and considering factors like soil type, plant type, and weather conditions, you can achieve optimal watering for your lawn.

Troubleshooting Common Issues
The Problem with Uneven Watering
Uneven watering is a common issue that can arise when adjusting your oscillating sprinkler. This can lead to dry spots in your lawn and overwatered areas, both of which can damage your grass.
One possible cause of uneven watering is a misaligned or clogged nozzle. To fix this issue, remove the nozzle and clean it thoroughly with a toothbrush or small brush.
If the nozzle is damaged, replace it with a new one. Another possible cause of uneven watering is incorrect range or width settings on the sprinkler.
Make sure that you have set the range and width controls to the appropriate settings for your lawn size and shape. Also, check that the water flow rate is adequate and adjust accordingly.
Low Water Pressure
Low water pressure can negatively affect your sprinkler’s performance by reducing its range and coverage area. This issue can have several causes, including a kinked hose, clogged filter screen, or worn-out washer in the hose connector. To fix low water pressure issues caused by a kinked hose or clogged filter screen, turn off the water source and disconnect both ends of the hose.
Straighten out any kinks in the hose and clean out any debris from the filter screen with a brush or toothpick. If you suspect that worn-out washers are causing low water pressure issues, replace them with new ones using pliers to unscrew the old ones before replacing them.
Clogged Nozzle
Clogging of nozzles in an oscillating sprinkler due to hard-water deposits leads to non-uniform distribution of sprayed water which becomes quite visible on hot sunny days when some parts become parched while others are excessively drenched. The solution for this problem lies in soaking nozzles overnight in vinegar and then washing it with warm water in the morning.
RELATED: How To Turn On Sprinkler System In Spring: Complete Guide
Frequently Asked Questions
How do I adjust my sprinkler settings?
To adjust your sprinkler settings, locate the adjustment screws or knobs on your sprinkler head and use them to modify the spray pattern, direction, and coverage area.
How do you adjust an orbit oscillating sprinkler head?
To adjust an Orbit oscillating sprinkler head, turn the adjustment dial to set the desired coverage and adjust the tabs or levers to control the spray width and distance.
How do you adjust sprinkler spray distance?
To adjust the sprinkler spray distance, use the distance control knob or screw on the sprinkler head to increase or decrease the water pressure, which affects the spray reach.
How do you manually adjust sprinkler heads?
To manually adjust sprinkler heads, locate the adjustment mechanism on the head, such as a screw or tab, and use it to change the spray pattern, angle, or coverage area.
Is it easy to adjust sprinkler heads?
Adjusting sprinkler heads can be relatively easy with the right tools and knowledge of your specific sprinkler model’s adjustment mechanism.
How do oscillating sprinklers work?
Oscillating sprinklers work by moving a metal arm back and forth, which oscillates the nozzle and creates a fan-shaped spray pattern for watering lawns or gardens.
Conclusion
Adjusting an oscillating sprinkler is a simple process that can yield great results for your lawn. By understanding your sprinkler’s parts and how to adjust them for optimal performance, you’ll be able to keep your lawn healthy and vibrant throughout the year.
If you encounter any issues while adjusting your sprinkler, follow the troubleshooting tips outlined above to identify and solve common problems such as uneven watering, low water pressure, or clogged nozzles. With a bit of patience and persistence, you’ll be able to enjoy a lush green lawn that makes all of your neighbors jealous!

